Create an API in Azure App Service - Revista PROGRAMAR Nº 49
I had the pleasure of write an article to the Revista PROGRAMAR, a Portuguese collaborative magazine about programming. I’m glad with my first article for a magazine and especially because, I'm side by side with people that I admire like Paulo Morgado or Sara Silva, for instance. This was an amazing experience and I want to share with you the result of it.
Introduction
In March, Microsoft announced an improvement in his services by introducing the new Azure App Service. This service covers the “oldest” Websites, now named as Web Apps, the Azure Mobile Services, now, Mobile Apps, and introduce new capabilities as Logic Apps and the API Apps. This article talks about the last one. The question is: What’s the reason to create an API App, and not a Web API in a Website? This question can be easily answered, analysing the feature list, for example:
- Access Control using Azure Active Directory or OAuth services, as Facebook or Twitter;
- Fast integration with the Swagger Framework;
- Easy integration with Logic Apps;
- Private gallery of APIs, enabling us to provide APIs to the other members of the organization;
- Automatic generation of an SDK for our API.
In this article we will see, how to create an API, publish in our subscription and create an SDK to consume it.
Description
There are many services, inside the organizations, that are necessary to multiple applications. A good example of that is the send email notifications. Let imagine that we pretend to provide an API, so that all applications of our organization, can easily send emails, without need to know the logic of using the email server. Before we start, we need to be sure that Microsoft Azure SDK for .NET 2.6 is installed.
Create an API App project
Let’s start to see how to create a project for our API App.
- Open Visual Studio 2013;
- Create a new project using File > New Project;
- Choose the template ASP.NET Web Application;
- Give a name to the project, in this case we will use MailApi;
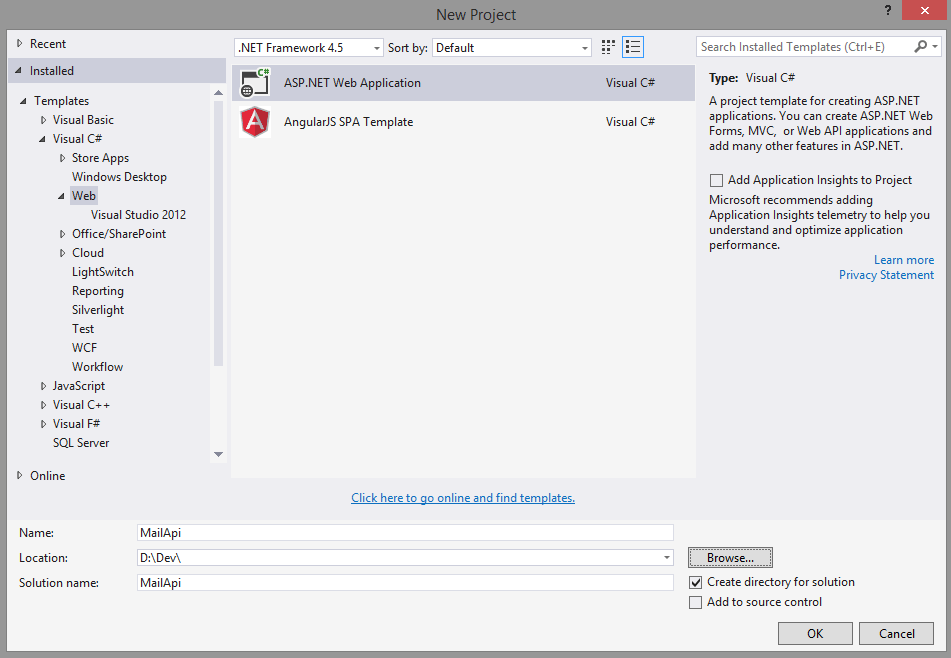
- Click OK;
- Select the template Azure API App;
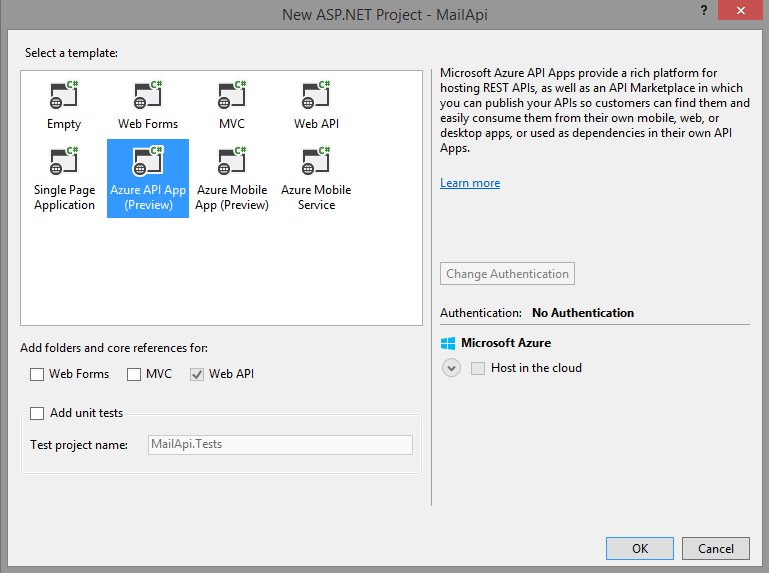
- Click OK and to create the project.
Create the service to send emails
Let’s see how to expose a method for sending emails in our API. For that, we will create a class that represents the data model to receive the request, and a controller to provide the sending method.
- In the folder Models, add a new class with the name MailModel. Mouse right click in the folder Models, and select the option Add > Class.
- In the created file, MailModel.cs, add the following code:
   using System.ComponentModel.DataAnnotations;
   public class MailModel
   {
      [Required]
      [EmailAddress]
      public string To { get; set; }

      [Required]
      public string Subject { get; set; }

      [Required]
      public string Body { get; set; }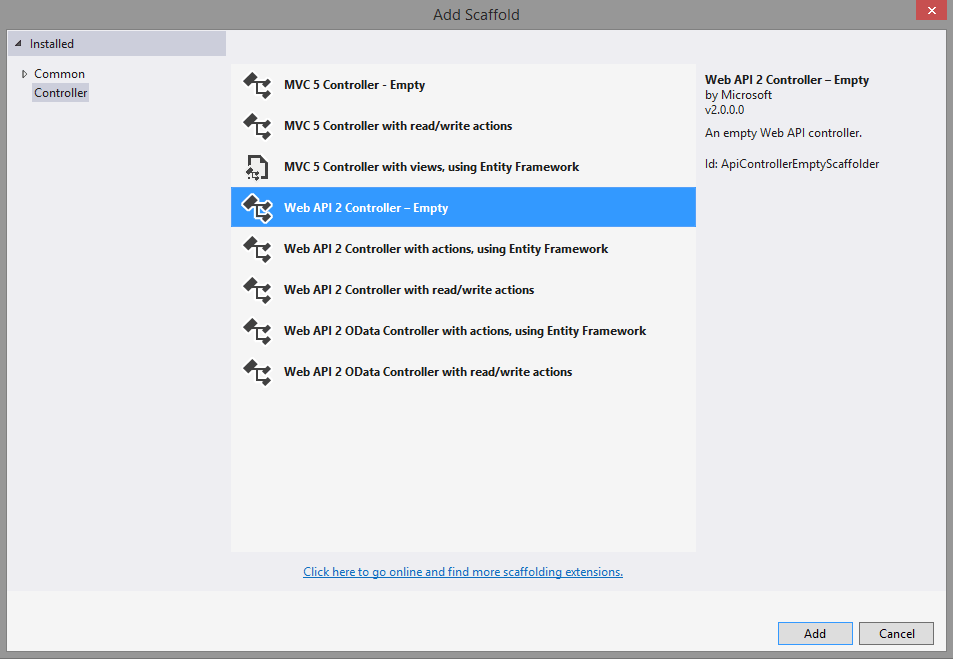
}- Add a controller to the project (controllers file) with the name MailController, using the template, Web API 2 Controller – Empty.
- In the created file, MailController.cs, add the following method:
   using MailApi.Models;
   [HttpPost]
   public HttpResponseMessage Post([FromBody]MailModel data)
   {
      using (var client = new System.Net.Mail.SmtpClient())
      {
        // create the message
        var mailFrom = new System.Net.Mail.MailAddress("noreply@deathstar.com", "Death Star");
        var mailTo = new System.Net.Mail.MailAddress(data.To);
        var mail = new System.Net.Mail.MailMessage(mailFrom, mailTo);

        mail.Subject = data.Subject;
        mail.Body = data.Body;
        mail.IsBodyHtml = true;

        // send email
        client.Send(mail);
      }
      return Request.CreateResponse(HttpStatusCode.OK);
   }
Configure the service
Since in this example we will send the e-mail via SMTP, we will need to configure the e-mail server data.
- Access the Web.config file of our application;
- Add the following configuration (before the line):
       <system.net>
         <mailSettings>
           <smtp from="noreply@deathstar.com">
            <network host="mail.deathstar.com" port="587" userName="noreply@deathstar.com" password="#MayTheForceBeWithThisPassword!" enableSsl="true" />
           </smtp>
         </mailSettings>
</system.net>- Fill in with the data from our server.
Publish the application to the Azure App Service
The publication can be made to an App Service, previously created using the portal, but in the next step we will see how to create the same without leaving Visual Studio.
To do this, it’s required to have an Azure subscription. If you don’t have it, you can create one test subscription of a month, in http://azure.microsoft.com/en-us/pricing/free-trial/. If you already have it, follow the next steps:
- In Solution Explorer, right click in project and click Publish;
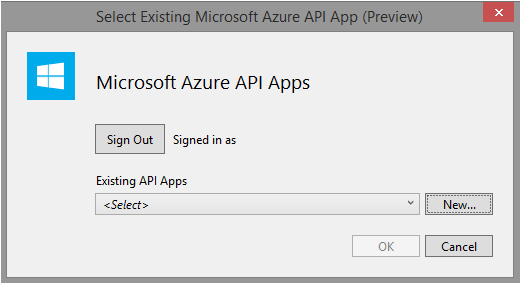
- In the publish dialog, access the Profile panel and choose the option Microsoft Azure API Apps;
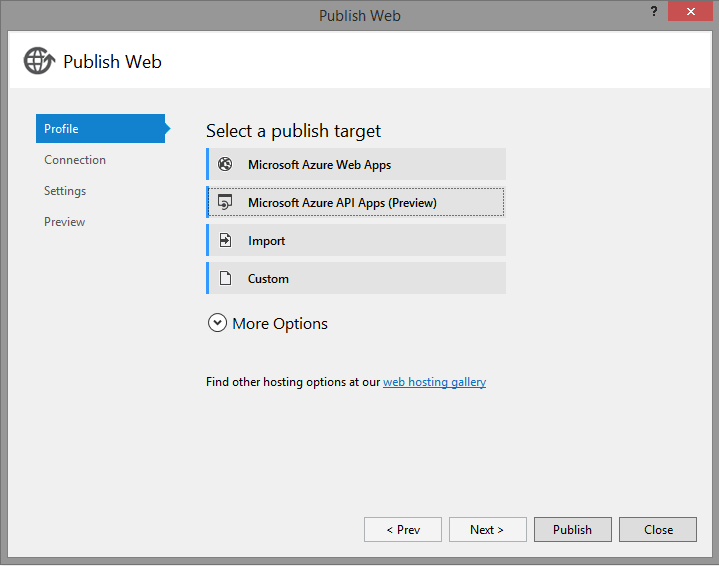
- Click New to create a new API App in the subscription;
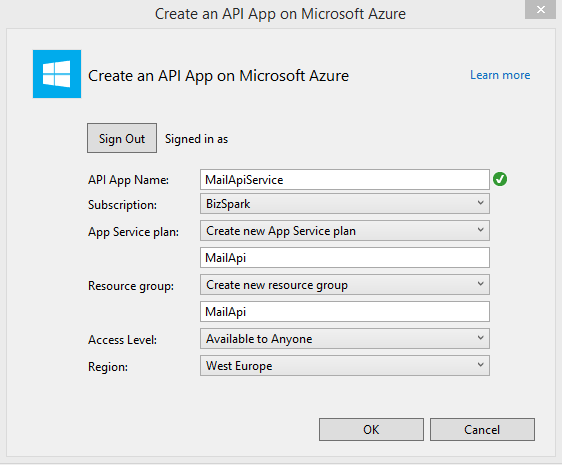
- In the Create dialog, add:
- The API App name. Here we will use MailApiService;
- Select the disired subscription;
- Pick a name to the App Service;
- Pick a name to the Resource Group;
- Choose the access level Available to Anyone;
- Pick the region where you what to host the App Service.
- Click OK and wait a few minutes while the service is being created. The creation request can be followed in the Azure App Service Activity panel;
- Once the App Service is created, we go back to the step number 1, access the publish dialog, and we click in the Publish option;
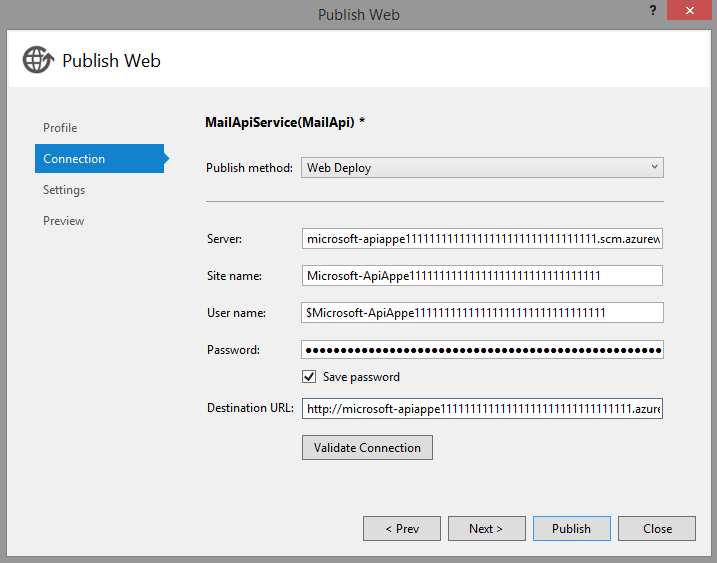
- The service will be published.
Consume na API from a .NET client.
Let’s see how to create an SDK to our API and use it.
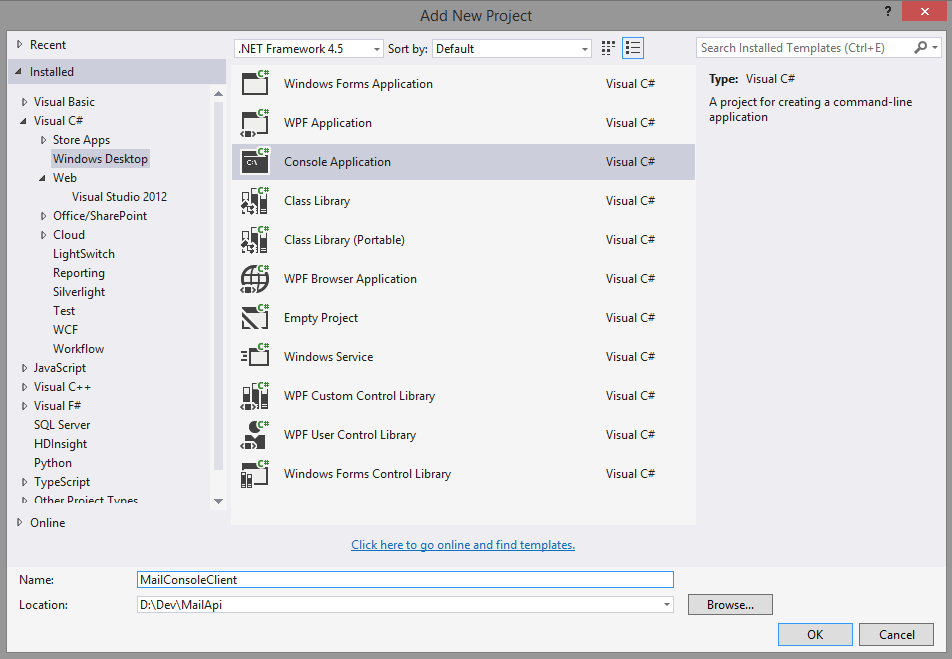
- Add a Console Application to our solution;
- In the Solution Explorer, right click in the Console Application and select the option Add > Azure API App Client;
- In the presented dialog, pick the option Download from Microsoft Azure API App and select the MailApiService, create previously;
- Click OK and wait until the SDK is created;
- When the last step is completed, we are ready to invoke our API, as the following code shows.
  class Program
  {
    static void Main(string[] args)
    {
      var client = new MailApiService();
      var data = new Models.MailModel { To = "darth.vader@deathstar.com", Subject = "War Report", Body = "The Force awakens" };

      var response = client.Mail.Post(data);

      Console.WriteLine("Done!");
      Console.ReadKey();
    }
  }
Summary
With this new service created by Microsoft, we are able to provide features that in the past had a huge development cost, in an easy and quick way. The private gallery in conjunction with the easy way to consume APIs, provides the required capabilities to create an API ecosystem.