Move your database to new SQL Azure Service Tiers
In the last Build conference Scott Guthrie announced the new Basic and Standard tier option to the SQL Databases on Azure. Those tiers bring amazing features and you can find more about them in the Scott's post. If you want to try it, as I did, go ahead and take advantage of the 50% discount during the preview period.
You can find here how to move your SQL Database currently in the Web or Business edition using the following tips.
Before you start, make sure that you have a Windows Azure Storage Account and a container in it.
First of all you should take your web site or any client of your database offline, just to ensure that no one updates the database during this operation.
Open a connection to your SQL Server using SQL Management Studio. Right click on your database. Choose "Tasks > Export Data-tier Application". Make sure that you store the bacpac file in your Windows Azure Storage. You can find a good example here.
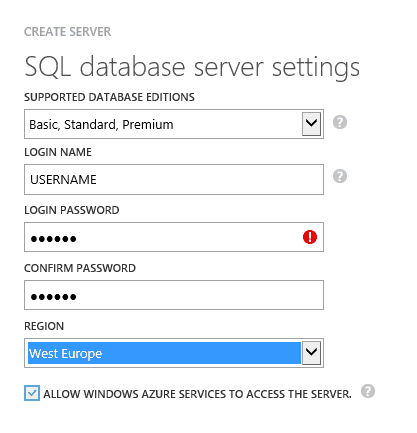
Now you need to create a SQL Server before create the database, by some reason (probably a "preview version bug") if you try to import the database before create the server you will get an error. So, go to Azure Manage web site and create a new SQL Server. Make sure that you set the "Supported Database Editions" to "Basic, Standard, Premium".

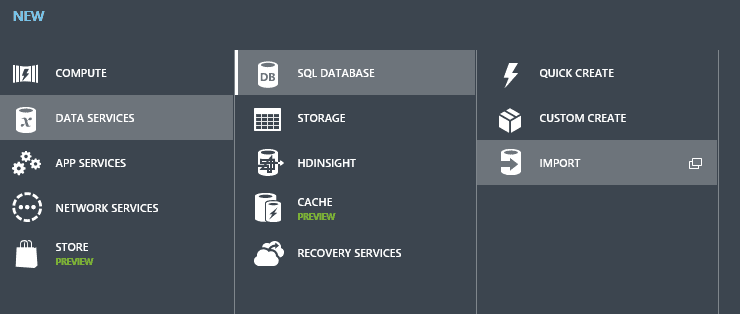
After that, add a new SQL Database (imported from the previous backup) to the server created in the last step.

Select the Backup that you made, choose one of the Preview Editions and the server created before.
When the create database operation is completed, just update your connection string and you are ready to go.
Just remember to delete the backup from storage and the old server if you want.
Enjoy it!